Merkury Smart Wifi Camera Setup Manual Instructions
Below is our instruction manual that gives you step-by-step information to help you configure your Merkury Smart Wifi camera. Enjoy.
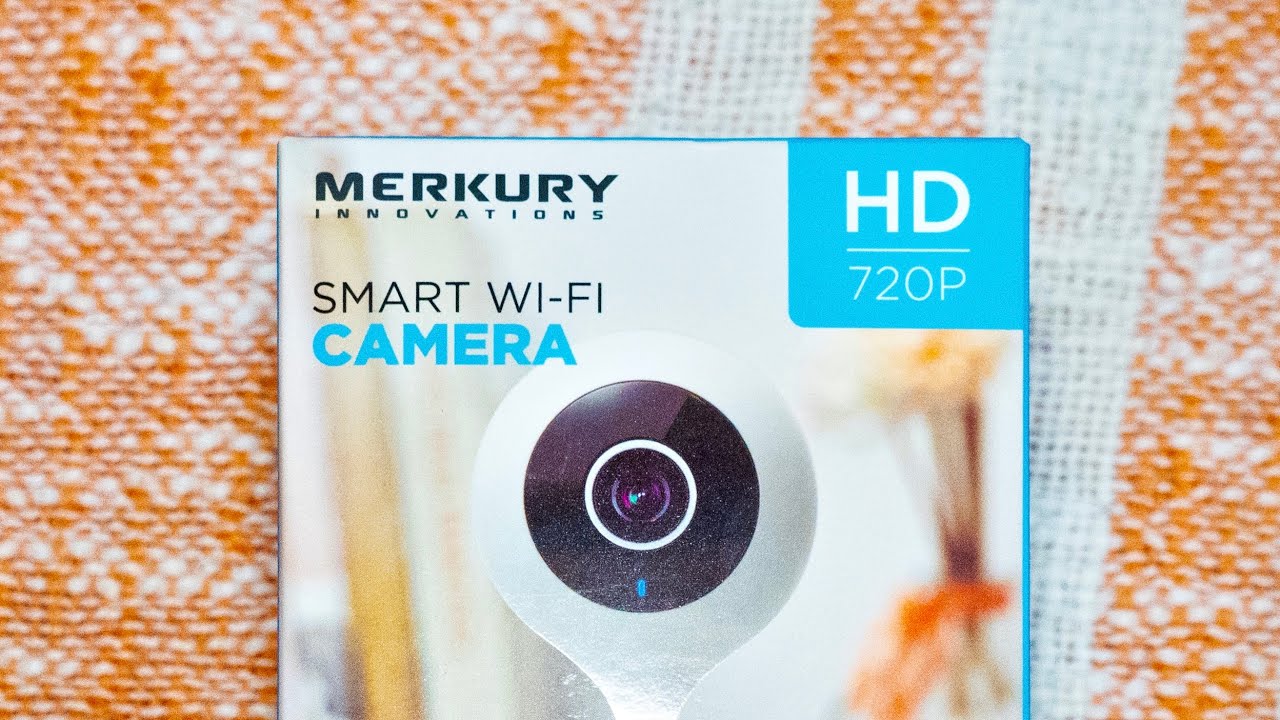
We appreciate you choosing a MERCURY smart home product.
Geeni is a handy software that lets you manage anything directly from your phone or tablet, so download it to get started utilizing your new gadgets. You may quickly connect to your home WiFi and manage numerous devices with the touch of a button.
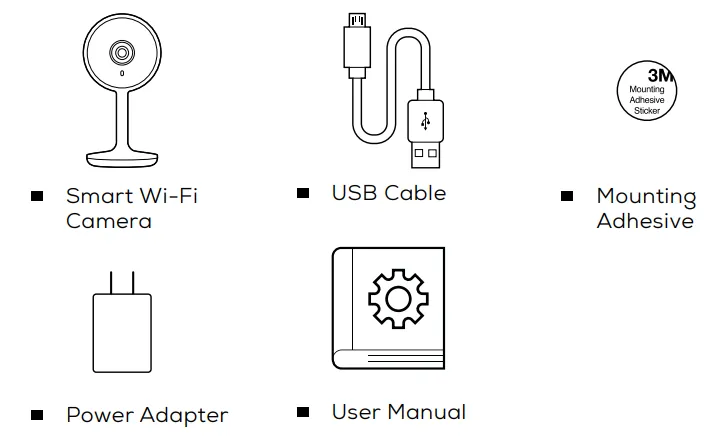
What’s In The Box
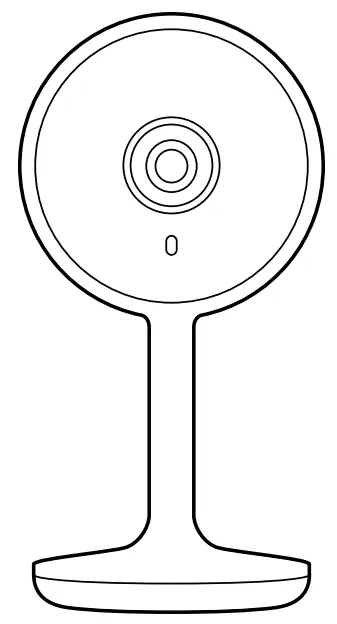
Merkury Smart Wifi Camera Setup
The Geeni app must first be downloaded from the Google Play or app store. Below are the links:
- https://apps.apple.com/us/app/geeni/id1177386276
- https://play.google.com/store/apps/details?id=com.merkuryinnovations.geeni
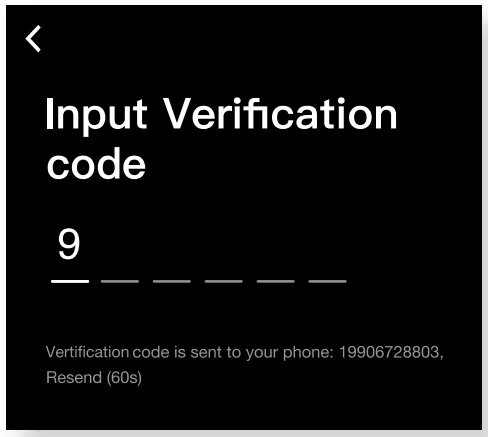
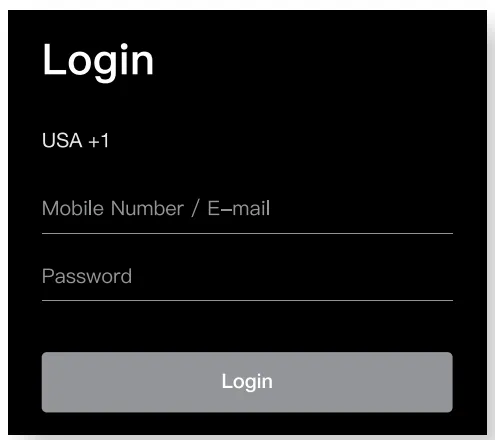
The next thing that you need to do is register your account through the Geeni app
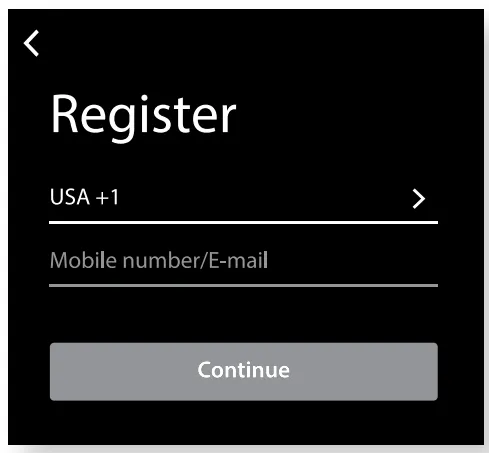
Then you need to make a password by entering the verification code.
Log into the Geeni app
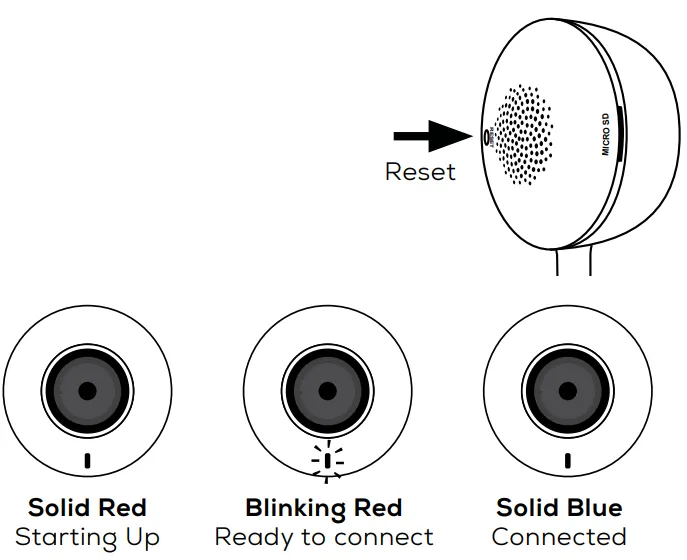
Utilize the USB cord that is included to connect the camera to a power source. During startup, the indicator will be continuous red; however, after connecting, it will start to flash red. Reset it if it doesn’t blink.
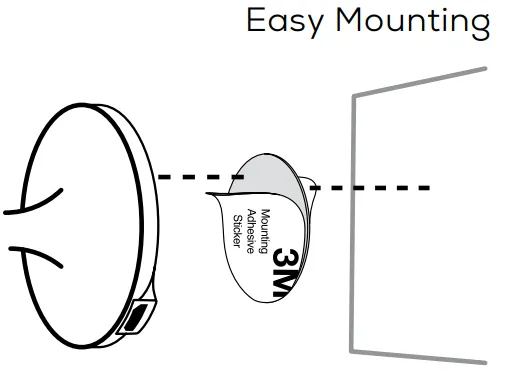
Mounting
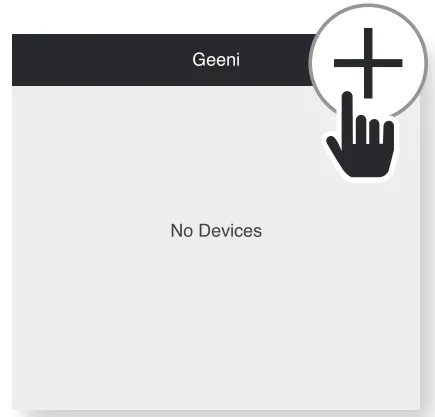
The third step is to add your device
Click “Wi-Fi Camera” in the top right corner of the Devices screen in the Geeni app.
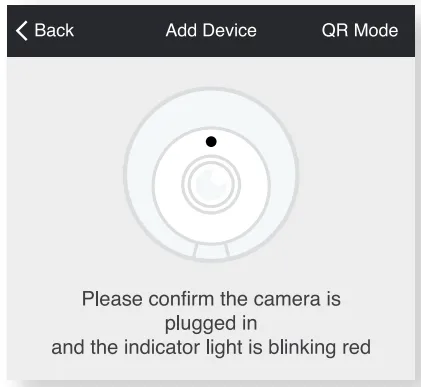
When the camera’s red light is blinking to indicate that the device is prepared for a connection, select “Next Step.”
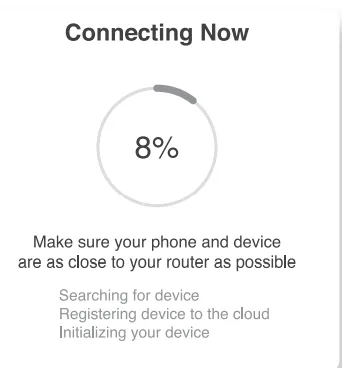
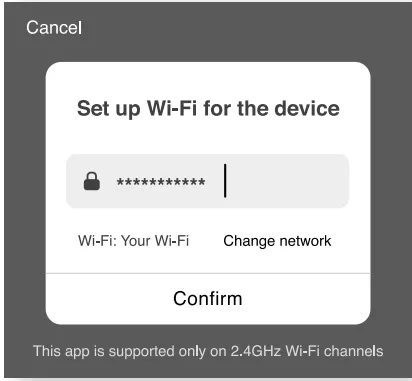
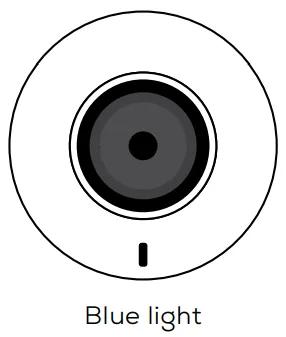
Enter the password for your Wi-Fi network. The Geeni app will make a connection attempt. It might take a little while. When the blinking light stops flashing and turns solid blue, the connection worked!
Geeni cannot join 5GHz networks and if the connection is unsuccessful, try connecting in QR Mode.
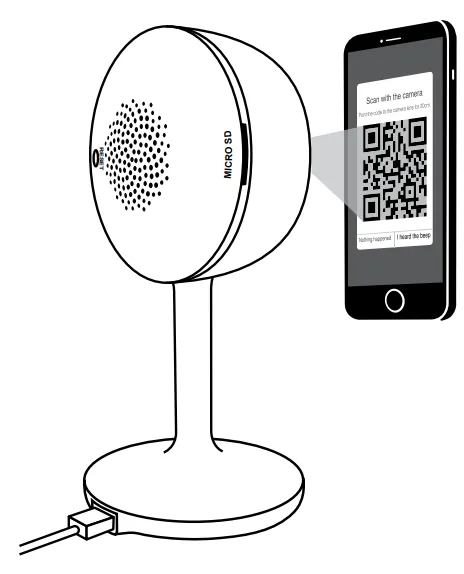
Adding Your Device Through QR Mode
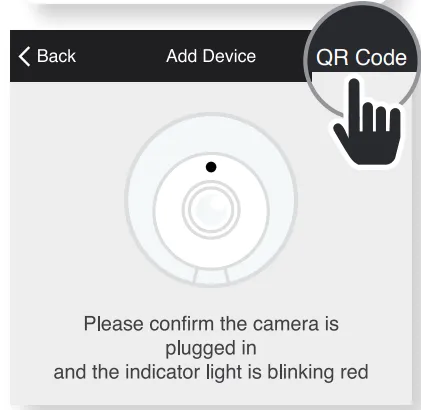
Click + in the top right corner of the Devices screen in the Geeni app. Select “Wi-Fi Camera.” In the upper corner, select “QR Code.” Enter your Wi-Fi login information and click Next.
Use the camera to read the QR code. By selecting “I heard the beep” once the camera beeps, your camera will be added.
When the gadget is connected properly, the indicator light turns solid blue! Geeni is unable to connect to 5GHz networks.
What does the flickering light on the gadget represent and how can I reset it? Press the reset button for three to four seconds to reset the camera.
Merkury Smart Wifi Camera Settings
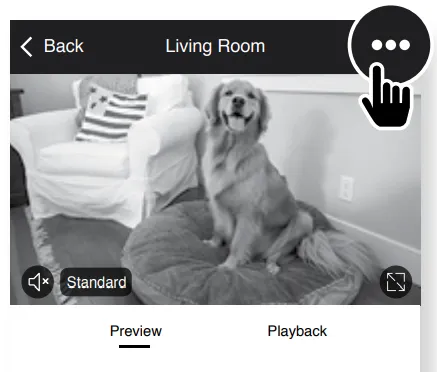
Select the camera you want to edit from your primary device list, then click the ” ••• ” icon in the top right corner to access advanced options. Press to change the name of your gadget to anything like “Kitchen” or “Babies Room”.
Sharing Devices
Let roommates, spouses, friends, or relatives watch what your cameras capture. You may choose who is permitted to check in, use the camera, and set notifications, whether the location is a baby’s cot or the family dog.
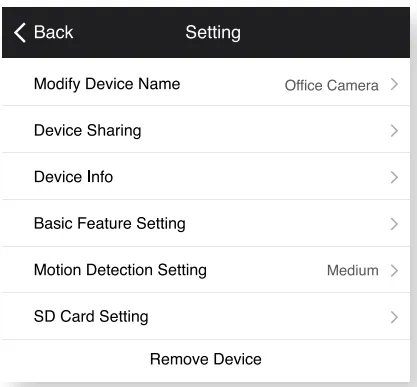
Delete Camera:
The camera should be removed from your account. It will always be associated with your account until it is removed.
Indicator Light:
The camera shows that it is on by lighting up by default. To turn off the light, select “Indicator Light.”
Flip
Toggling the “Flip” function will rotate the image so that it is right side up if your camera is mounted upside down.
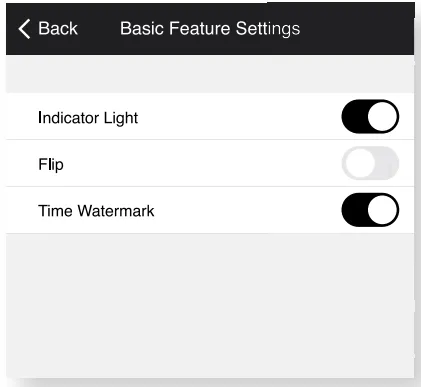
Time Watermark:
To view a timestamp of when the movie is taking place, turn on the time watermark.
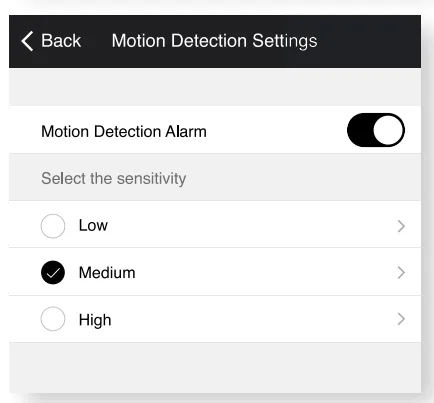
Motion Detection:
When enabled, the camera will alert you via your phone whenever it detects movement. Press to disable “Motion Detection” or to adjust its sensitivity.
Frequently Asked Questions
Can I Share With Family & Friends?
Yes! You can grant family members and friends access to all Merkury devices, including cameras, plugs, lamps, doorbells, etc. To grant or remove sharing permissions, use the “Profile” button and “Device Sharing” link in the Geeni app.
The other user must have downloaded the Geeni app and created an account before they may share.
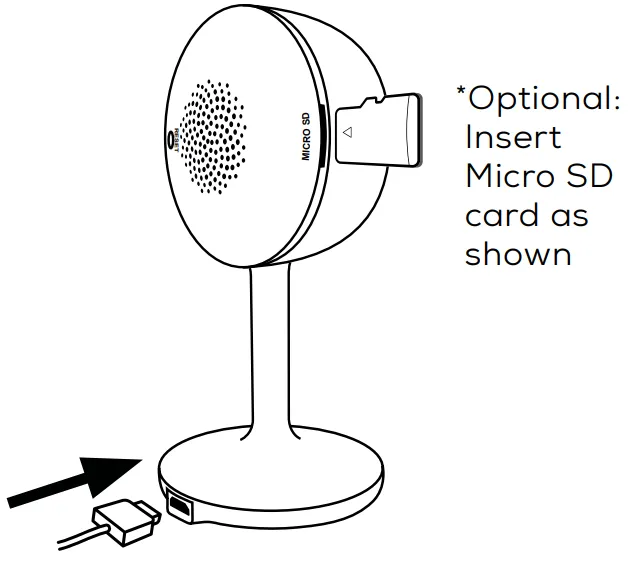
Use of Micro SD Cards for Recording
The smart Wi-Fi camera can display live camera video without a Micro SD card (extra, purchased individually), store screenshots or movies of the camera stream to your smartphone for later use, and record still images of movement alerts when alerts are turned on.
To further enable video recording and playing from your phone, install a Micro SD card. The camera will continue to capture and replay video to your phone after the card is placed until it is full (up to 128GB supported).
Do not attempt to remove the MicroSD card in order to see the movie because it is encrypted and only accessible through the Geeni app on your phone.
Can the camera record a lot of video?
A 32GB card can store weeks’ worth of nonstop footage because the camera uses about 1GB of storage every day, depending on video quality. You never have to be worried that you’ll run out of storage capacity because when the memory fills up, the oldest recording will be immediately replaced by a fresh recording.
What number of devices can I manage?
The Geeni app can manage an infinite number of gadgets in an infinite number of places. The number of devices that can be linked to your router may be restricted.
The name of my Merkury device seems strange. How do I change its name?
Click on one of the devices you wish to change from your main device list, select “Modify Device Name” from the advanced settings menu by clicking the “•••” icon in the top right corner of the screen (or Modify Group Name, if applicable).
You can then select a name that is more well-known.
How far can wireless devices reach?
The characteristics of the space and your home router have a significant impact on the Wi-Fi range in your home. For precise range information, consult your router’s specifications.
Will Geeni continue to function if my Wi-Fi or Internet is down?
To utilize Merkury items remotely, a Wi-Fi connection is required.
Merkury Smart Wifi Camera Setup Troubleshooting
Unable to access your WiFi network?
Make sure you used the right Wi-Fi password when setting up the network. Check for any issues with your Internet connection.
Reset your Wi-Fi router and give it another try if the signal is too faint.
VOICE CONTROL GUIDE
We appreciate you choosing a MERCURY smart home solution. Follow these instructions after making sure your gadgets are already configured with the Geeni app. These top smart assistants can stream video from your video device.
Name and voice-activate each device

Simply say “OK Google” or “Hey Google” and ask to operate your MERCURY smart home devices. Ensure that the Geeni app has been used to configure your devices.
Go to the Home Control menu in the Google Home app once it is open.
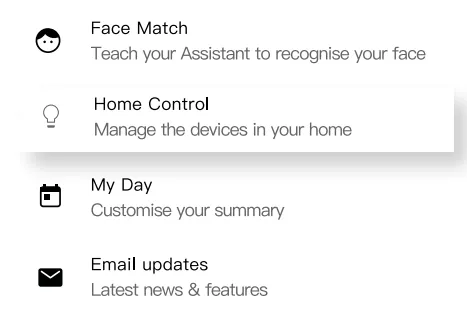
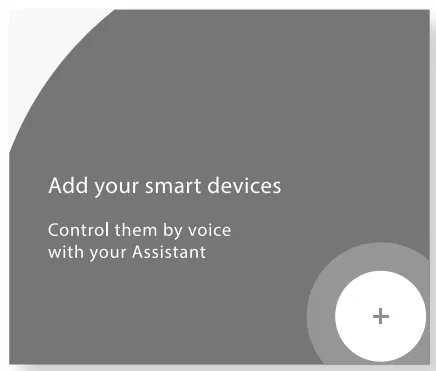
Press the “+” button.
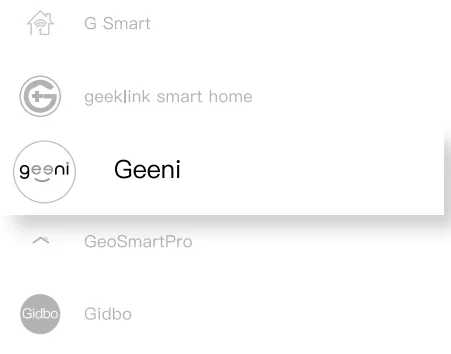
From the choice of Home Control partners, select “Geeni”.
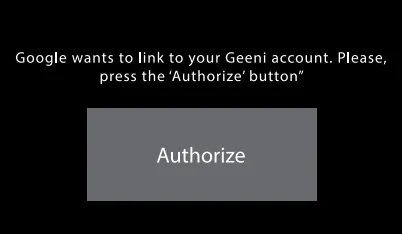
Utilize your Geeni app’s login and password to authorize your profile with Google Assistant.
MERCURY devices and your Google Home app are now connected!
Now, you can ask Google to control your MERCURY gadgets by saying “Hey Google.”
To give your devices names and rooms, go to the “Home Control” section of the Google Home app at any time. The Geeni app allows you to rename your devices, and Google Assistant will use that name going forward.
Therefore, Google Assistant will continue to refer to a camera by its previous name if you rename it to “Living Room Camera” or “Baby’s Room.” It is always possible to give it a moniker using the Google Home app.
Notice By FCC
Devices will be able to be managed by room using Google Assistant. Just ask Alexa to manage your MERKURY Smart Wi-fi Camera home goods. Ensure that the Geeni app has been used to configure your devices.
According to part 15 of the FCC Rules, this equipment has been evaluated and found to conform with the requirements for a Class B digital device. These restrictions are made to offer a home installation a level of protection against unwanted interference that is appropriate.
If not installed and utilized in accordance with the instructions, this equipment, which generates, utilizes, and can radiate radio frequency energy, may cause hazardous disruption to radio transmissions.
There is no assurance that interference won’t happen in a specific installation, though. The user is recommended to attempt to correct the interference by one or more of the following steps if this device does in fact cause an interference problems to radio or television broadcast, which can be determined by turning the equipment on and off.
- The receiving antenna should be turned or moved.
- Increase the distance between the gadget and the receiver.
- The equipment should be plugged into an outlet on a different circuit than the receiver.
- For assistance, speak with the dealer or a qualified radio/TV technician.
You risk losing your ability to use this equipment if you make any alterations or modifications to it that have not been expressly authorized by the manufacturer. Part 15 of the FCC Rules are adhered to by this gadget.
Two requirements must be met for operation: This equipment must accept all interference, including interference that could lead to undesirable operation, and it is prohibited from causing harmful interference.
The tool has been assessed to meet minimum standards for RF exposure. The device can be utilized without limitations in portable exposure situations.